A little bit of context
In the past few years I have been experimenting a lot with AWS based technologies and it's been quite the ride.
Recently I stumbled upon this website and it was quite the reading so I decided to give it a try and share my experience.
What is it?
AWS Amplify is a service provided by Amazon Web Services which gives the ability to create end to end solutions for mobile and web platforms leveraging AWS.
It also provides an easy way to configure features called modules such as named authentication, storage, backend API, hosting and deployments.
Next Steps
In this post I am going to build and deploy a React application with GraphQL.
Pre-Requisites
Make sure you have an account with AWS. It's free.
If your company provides you with a DEV account, first make sure you have the service enabled, otherwise, there is no shame in getting your own personal account.
If you decide to sign up, allow a few hours to get all services enabled, otherwise you will be blocked as you make progress.
Now you should be all set.
Install and configure Amplify CLI
npm install -g @aws-amplify/cliNow in order to configure the installed Amplify with our AWS account issue the below command.
amplify configureThis will prompt a series of questions that we need to answer.
First, it will ask us to log in to our AWS account using the web console.
The next important question is the IAM user that it will create for our Amplify CLI tool.
After specifying a name for the user it will again redirect us to the IAM console where we need to provide necessary permission policies for our user.
Here make sure to add AdministratorAccess policy to the user. Then go to Security Credentials tab and create an access key for this user and remember to download and store credential details. Back in the console as next steps, it will ask for this accessKeyId and secretAccessKey. Now our configuration for Amplify CLI is done.
Create a React application
For the creation of a new react application issue the following commands.
npx create-react-app amplify-react-sample
cd amplify-react-sample
npm start


If everything went smoothly in localhost:3000 it should show the newly created react application.
The next step is to add aws-amplify to our react application as a dependency. This package will have the functionality of doing all the configurations on Amplify from our react code.
npm install aws-amplify @aws-amplify/ui-reactamplify initThe following modifications in our project will be done during this step.
- A new folder named amplify will be created at the root level of the project. This stores every configuration related to our backend (AWS resources). (In this article we are going to add authentication and GraphQL API). As we add more amplify features configurations related to those features will be stored inside this folder as Infrastructure As code.
- A file called aws-exports.js will be created in the src directory that holds all the configuration for the services that we will create with Amplify. For now, it only contains region information because we are still not using any Amplify services.

Add Authentication
For authentication, Amplify uses AWS Cognito as the main authentication provider. AWS Cognito provides many features like authentication, user registration, account recovery, and many more. In order to add Cognito to your app, follow the next command:
amplify add authAgain we will be prompted with questions for our authentication configurations. We will choose the default configuration for security configuration. (if we want we can update this later by running amplify update auth).
For the sign-in option, you can choose either username or email.
And that’s it, now we have our authentication module created for us. But before testing it in our application we need to push this configuration to Amplify. To do that simply issue the following command in the terminal.
amplify pushThis command will create the required configurations on Amplify and Cognito on AWS and will also edit our aws-exports.js file with Cognito auth configurations. The next step is to use this Cognito authentication in our react application. For that first, we need to import the Amplify module for our application. Edit index.js file to import Amplify and configure Amplify module using the configurations in aws-exports.js file.
import Amplify from 'aws-amplify';
import awsconfig from './aws-exports';
Amplify.configure(awsconfig);
import { withAuthenticator, AmplifySignOut } from "@aws-amplify/ui-react";Now that we have added the Amplify authentication in our react application let’s start the server and test whether it works.
npm start

Now try to login using the user we created. If everything works just fine let’s move to the next task.


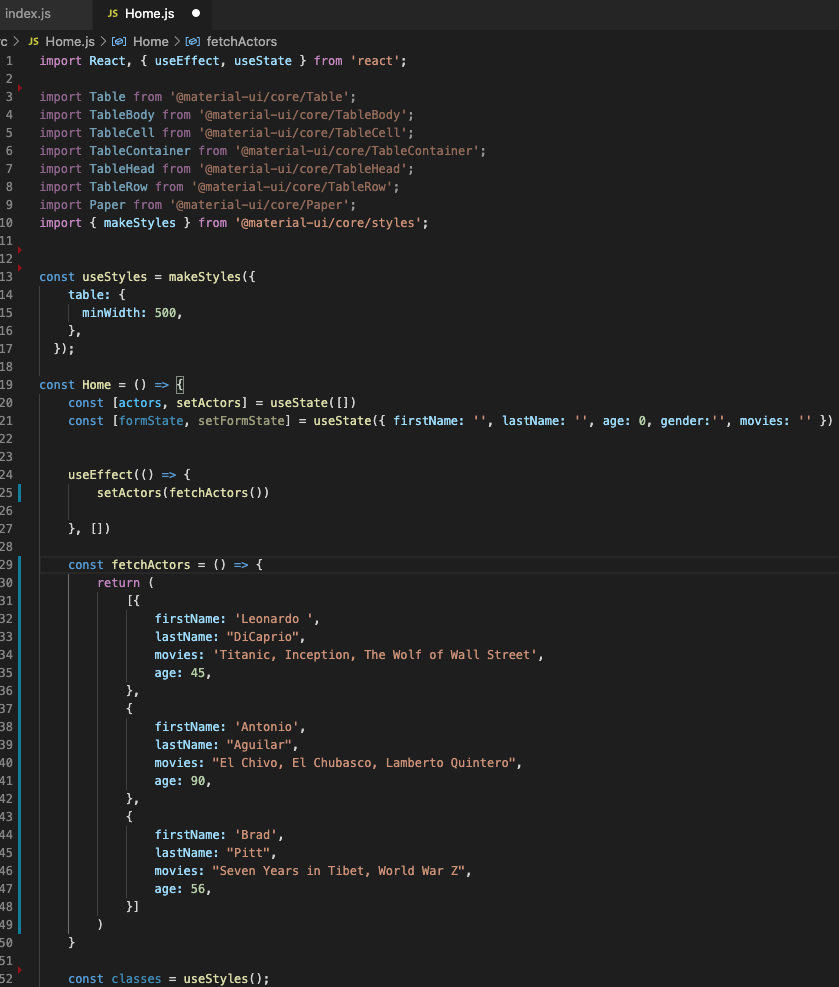
In the above code, I am using material-ui for the creation of the table which you can install using
The code only displays a table where for now we have defined a set of data inside fetchActors() method. (Make sure to import the Home component in App.js as well)
Now, let’s make this dynamic using GraphQL to retrieve actor information from an API. To add a GraphQL to our application simply issue the following command in the terminal.
Add GraphQL
Amplify supports creating serverless backend APIs using AWS AppSync. AppSync supports both REST and GraphQL API frameworks. For now we are going to use AppSync GraphQL API.
Before adding our backend GraphQL API let’s do some modifications on our react application in order to show data in a table.

npm install @material-ui/coreNow, let’s make this dynamic using GraphQL to retrieve actor information from an API. To add a GraphQL to our application simply issue the following command in the terminal.
amplify add apiFor the questions you will be asked to provide select service as GraphQL and for authorization choose
Amazon Cognito User Pool.
Next for the schema template select Single object with fields. This will automatically create a simple GraphQL schema for us. Next when you asked to edit the schema press Y.
This will open our schema.graphql which is created automatically. There we can see the schema with model Todo already created.
type Todo @model {
  id: ID!
  name: String!
  description: String
}
type Actor @model {
  id: ID!
  firstName: String!
  lastName: String
  age: Int
  movies: [String]
  gender: String
}
amplify pushThis will create our GraphQL API on AppSync. Our database will also get automatically created on AWS DynamoDB. Also, it will create a new folder inside the amplify folder named backend. Our Actor schema and other AppSync related configurations can be found inside this folder.
At the end, we will be provided with the GraphQL endpoint which we have configured using Actors schema. Now if we go to the AppSync console we can see the newly created Actors API.


Now let’s start adding GraphQL API to our React application.
First, we need to import Amplify, API, graphqlOperation modules in our Home component.
import Amplify, { API, graphqlOperation } from 'aws-amplify'
import { createActor} from './graphql/mutations'
import { listActors} from './graphql/queries'
import awsExports from "./aws-exports";
Amplify.configure(awsExports);
const fetchActors = async () => {
        try {
            const actorData = await API.graphql(graphqlOperation(listActors))
            const actors = actorData.data.listActors.items
            setActors(actors)
        } catch (err) { console.log('Error when invoking graphqlOperation: listActors') }
    }
    useEffect(() => {
        setActors(fetchActors())

    }, [])

Next, let’s try to add actors using our react application. For this, we are going to use addActor Mutation which we already imported.
Apart from creating addActor() function we need to have input fields as well. Below is the fully completed code for the Home component.

Now our page will look like this: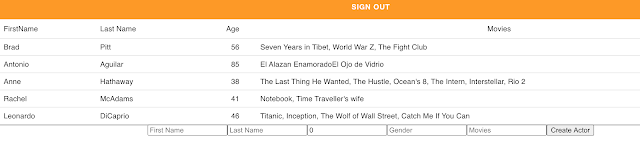
Finally we need to publish this module to Amplify. After a few minutes, all infrastructure will be get created and we will have an assigned URL.
const addActor = async () => {
        try {
            if (!formState.firstName || !formState.lastName) return
            const actor = { ...formState }
            setActors([...actors, actor])
            setFormState({ firstName: '', lastName: '', age: 0, movies: '' })
            await API.graphql(graphqlOperation(createActor, { input: actor }))
        } catch (err) {
            console.log('Error when invoking graphqlOperation createActor:', err)
        }
    }


Deploy and host on Amplify
Let’s add the hosting module for our application by issuing the following command.
amplify add hostingFinally we need to publish this module to Amplify.
amplify publish
You can go ahead and check it to make sure everything works as it should be.
As next iteration we could add CI.