While doing some casual browsing in a store, I stumbled upon this old laptop for practically nothing, so I decided to buy it.
The challenge now was to reimage it and since I own a Mac, the process was not going to be so straight forward.
Thankfully, after further research I was able to come up with a set of steps that any fellow Mac user can follow to take care of this challenge.
- Download the appropriate Windows Installation Image (ISO file) from their website
- Mount the image with Finder (double click)
- Insert target device (USB)
- Open Terminal and run these commands
diskutil list

diskutil eraseDisk MS-DOS "WINUSB" MBR diskNWhere diskN is the proper identifier for your device, in my case it was disk5 (be careful with this step, otherwise you will format the wrong disk)

rsync -avh --progress --exclude=sources/install.wim /Volumes/CCCOMA_X64FRE_EN-US_DV9/ /Volumes/WINUSB

This step will copy all files except one from the ISO image into your newly created USB Bootable drive. The reason why we skip that file is because it's massive and Mac will throw an error (it won't allow us to copy it).
In order to proceed with such massive file, you need to use WimLib, and the easy way to install any package on a Mac or Linux based system is via Homebrew.
Once you have installed Homebrew proceed to install WimLib via the appropriate Homebrew Formulae.
Now you are ready for the next and final command.
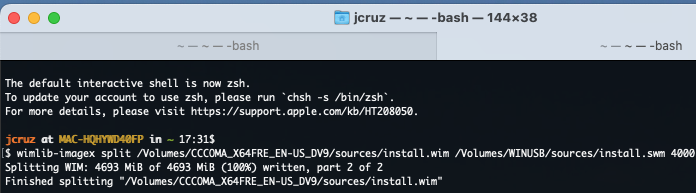
wimlib-imagex split /Volumes/CCCOMA_X64FRE_EN-US_DV9/sources/install.wim /Volumes/WINUSB/sources/install.swm 4000

Once you have the image ready, just plug it in and boot from USB and just follow the installation process.
Note:
If you face an issue with one of the files being corrupted while performing the installation, no worries, sometimes happens. I faced this issue a couple times, you just need to rinse and repeat.